Schema Import Guide
Manually documenting a database schema — copying table names, column names, data types, and constraints into a metadata tool — is slow and error-prone, especially on large databases with dozens of tables. BlueprintDB’s Schema Import feature reads the live structure of your database and populates a Blueprint automatically, in seconds. This guide explains how Schema Import works, which backends it supports, and how to use it effectively.
What Schema Import does
Schema Import connects to a live database and reads its structural metadata. For each table it finds, it records:
- Table name
- Column names, data types, lengths and precision
- Nullability (NOT NULL constraints)
- Default values
- Primary key columns
- Foreign key relationships (where the engine exposes them)
The raw database types are translated into BlueprintDB’s canonical type system — a backend-neutral set of types (String, Integer, Boolean, Decimal, DateTime, etc.) that can be translated back to any supported engine. This is what makes it possible to import a schema from MySQL and sync it to PostgreSQL, or from Access to SQL Server, without manual DDL rewriting.
Schema Import does not read or transfer data — it only reads structure.
Supported backends
| Backend | Schema Import | Tier |
|---|---|---|
| SQLite | ✓ | Free |
| MS Access (.accdb / .mdb) | ✓ | Free |
| MySQL | ✓ | Pro |
| MariaDB | ✓ | Pro |
| PostgreSQL | ✓ | Pro |
| SQL Server | ✓ | Pro |
| Oracle | ✓ | Pro |
| IBM DB2 | ✓ | Pro |
| Firebird | ✓ | Pro |
| dBASE (.dbf) | ✓ | Pro |
Step-by-step: importing a schema
1. Create or select a Program
Schema Import populates the Blueprint for the currently active Program. If you have not created one yet, go to Programs → New, enter a name, and save.
[SCREENSHOT: Programs window, one program selected/active]

2. Open Schema Import
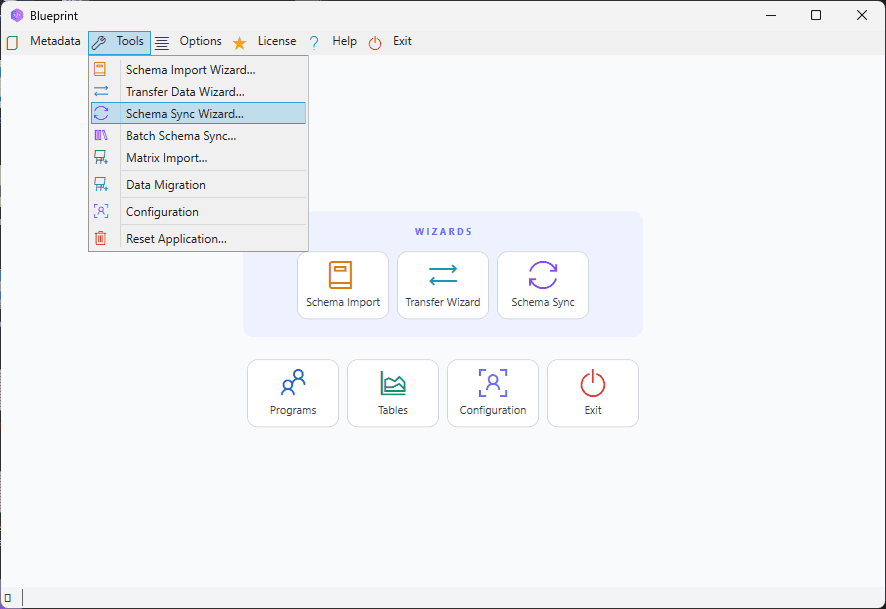
Click Schema Import in the main menu. The import window opens with a program selector at the bottom.
[SCREENSHOT: Schema Import window, empty, backend dropdown visible]
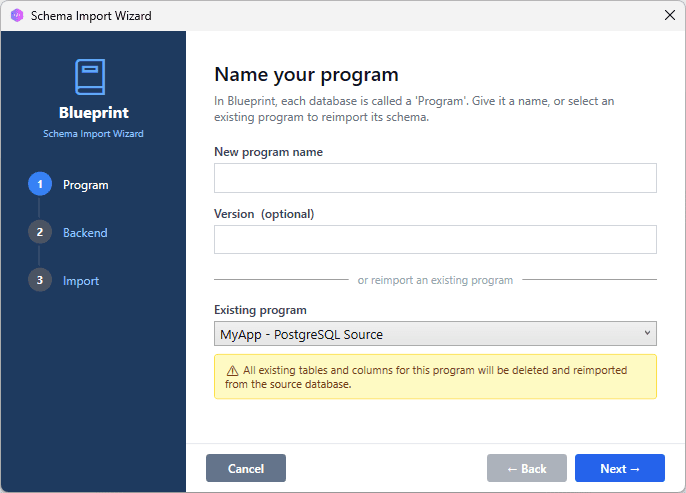
3. Select a Program and the backend
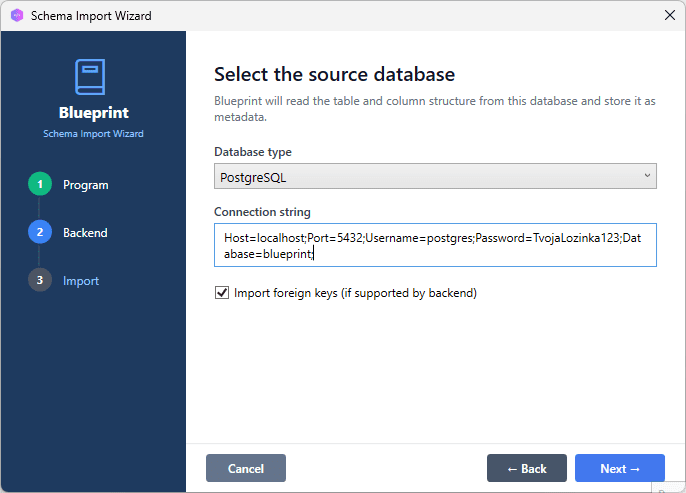
At the bottom of the window, select your Program from the Existing Program combo box, then press Next. On the next page, select your database engine from the dropdown. The connection form changes to match the backend:
- File-based backends (SQLite, Access, dBASE): A file path field appears. Click the folder icon to browse to the file.
- Server backends (MySQL, PostgreSQL, SQL Server, Oracle, DB2, Firebird): Host, port, database name, username, and password fields appear.
Fill in the connection details and click Next.
[SCREENSHOT: Schema Import window with PostgreSQL selected, connection fields filled in, Next button highlighted]
4. Import runs automatically
BlueprintDB connects to the database, reads all user tables found, and imports them into the Blueprint automatically. System tables and internal metadata tables are filtered out. A progress indicator shows which table is currently being processed.
[SCREENSHOT: Backend selected before starting import process]

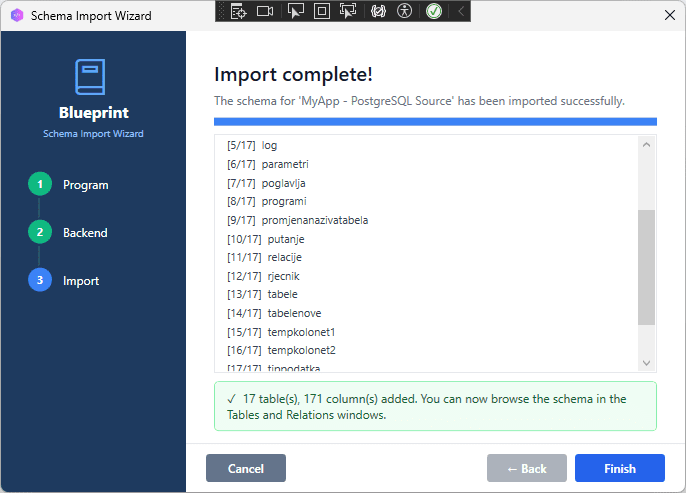
When complete, a confirmation message shows how many tables and columns were imported.
[SCREENSHOT: Import complete message, e.g. “17 tables, 171 columns imported successfully””]
5. Verify the result
Open the Tables window — all imported tables should appear in the list. Select a table and open Columns to inspect the mapped column definitions.
[SCREENSHOT: Tables window with imported tables; Columns window open for one table showing name, type, length, nullable]
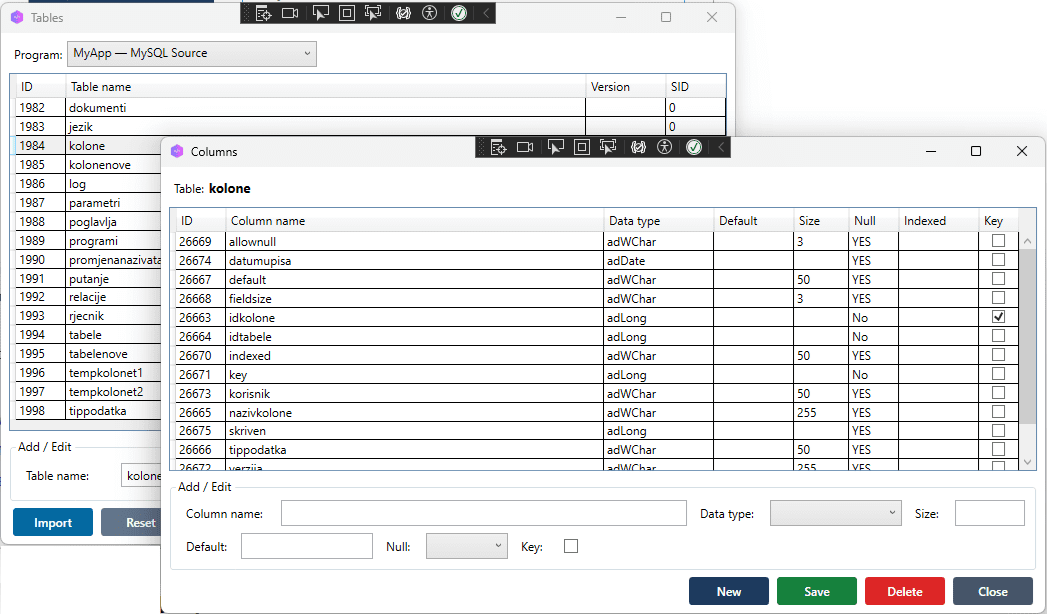
Check the following:
- Types — confirm that column types have been mapped correctly (see the type mapping section below)
- Primary keys — the PK column should be flagged; auto-increment columns should show the Identity flag
- Nullable — columns with NOT NULL constraints should show the required flag
Understanding the canonical type system
BlueprintDB does not store MySQL types, PostgreSQL types, or Oracle types directly. Instead, each column is stored with a canonical type — a backend-neutral representation. When syncing to a target engine, canonical types are translated to the closest native equivalent.
This is the full canonical type list and its common mappings:
| Canonical type | MySQL | PostgreSQL | SQL Server | SQLite |
|---|---|---|---|---|
| String(n) | VARCHAR(n) | VARCHAR(n) | NVARCHAR(n) | TEXT |
| LongText | LONGTEXT | TEXT | NVARCHAR(MAX) | TEXT |
| Integer | INT | INTEGER | INT | INTEGER |
| BigInteger | BIGINT | BIGINT | BIGINT | INTEGER |
| Boolean | TINYINT(1) | BOOLEAN | BIT | INTEGER |
| Decimal(p,s) | DECIMAL(p,s) | NUMERIC(p,s) | NUMERIC(p,s) | REAL |
| Float | DOUBLE | FLOAT8 | FLOAT | REAL |
| DateTime | DATETIME | TIMESTAMP | DATETIME2 | TEXT |
| Date | DATE | DATE | DATE | TEXT |
| Binary | BLOB | BYTEA | VARBINARY(MAX) | BLOB |
If a database column uses a type that does not map cleanly to a canonical type, BlueprintDB falls back to String or LongText and notes this in the import log. Review these cases manually after import.
Importing into an existing Blueprint
If the active Program already has tables defined, Schema Import will add new tables and columns without overwriting existing ones. Tables with the same name as existing Blueprint entries are skipped — BlueprintDB does not merge or overwrite existing metadata automatically.
To re-import a table that already exists in the Blueprint, delete it from the Tables window first, then run Schema Import again and select that table.
After import: next steps
Once the schema is imported and verified, you have several options:
- Use Schema Sync to apply the Blueprint to a different database engine — for example, sync the imported MySQL schema to a PostgreSQL target. See the MySQL to PostgreSQL migration guide for a full walkthrough.
- Use Transfer Data to copy row data from the source database to the target, after Schema Sync has created the structure.
- Maintain the Blueprint manually — add, rename, or remove columns in BlueprintDB and use Schema Sync to push changes to the live database over time.
[SCREENSHOT: Main BlueprintDB window with Schema Sync and Transfer Data buttons highlighted in the menu]
Troubleshooting
Connect fails — “Unable to connect to the server”
Check that the host and port are correct, the database server is running, and the network allows connections on that port. For cloud databases, verify that the firewall or security group allows inbound connections from your IP address.
Some tables are missing from the list
BlueprintDB only lists tables in the schema/catalog specified in the connection. Views, temporary tables, and system tables are excluded. If you expected a table and it is not listed, confirm it exists in the connected database with a direct query:
SHOW TABLES; (MySQL) or \dt (PostgreSQL).
Column type shows as String when it should be something else
The source column uses a vendor-specific type that BlueprintDB does not recognise (e.g. PostgreSQL JSONB, MySQL ENUM, Oracle CLOB). BlueprintDB falls back to String or LongText in these cases. After import, manually change the column type in the Columns window to the canonical type that best fits your data.
Import completes but no tables appear in the Tables window
Confirm that the correct Program is active. Open the Programs window and verify the right program is selected. Schema Import always writes to the currently active program.
Summary
Schema Import eliminates the most tedious part of setting up a Blueprint — manual data entry. It reads the live structure of any supported database, translates types to BlueprintDB’s canonical format, and populates the Blueprint in seconds. From there, Schema Sync and Transfer Data can move the schema and data to any other supported engine.