MySQL to PostgreSQL Migration
Migrating a production database from MySQL to PostgreSQL is one of the more demanding infrastructure tasks a developer can face. The two engines share SQL as a common language, but differ significantly in data types, identifier quoting, auto-increment syntax, and constraint handling. Done manually, the process involves exporting a schema, rewriting DDL statements, recreating indexes and foreign keys, and only then moving the actual data — with ample opportunity for mistakes at every step. This guide walks through the entire migration using BlueprintDB: from importing the MySQL schema into a Blueprint, syncing it to a fresh PostgreSQL database, and transferring all table data with the built-in Transfer Data Wizard.
Prerequisites
- BlueprintDB Pro installed (MySQL and PostgreSQL backends require a Pro license)
- Network access to both the source MySQL server and the target PostgreSQL server
- An empty target database already created in PostgreSQL:
CREATE DATABASE myapp; - Credentials with read access on MySQL and create/write access on PostgreSQL
BlueprintDB runs on Windows and connects to remote servers — the databases themselves do not need to be local.
Step 1 — Create a Program in BlueprintDB
BlueprintDB organises your work into Programs. A Program is a named container that holds the metadata (tables, columns, relations) for one logical database. Before importing anything, create a Program that will represent your MySQL source database.
- Open BlueprintDB and click Programs in the main menu.
- Click New, enter a name (e.g. MyApp — MySQL Source), and click Save.
[SCREENSHOT: Programs window with a new program saved, cursor on the newly created row]
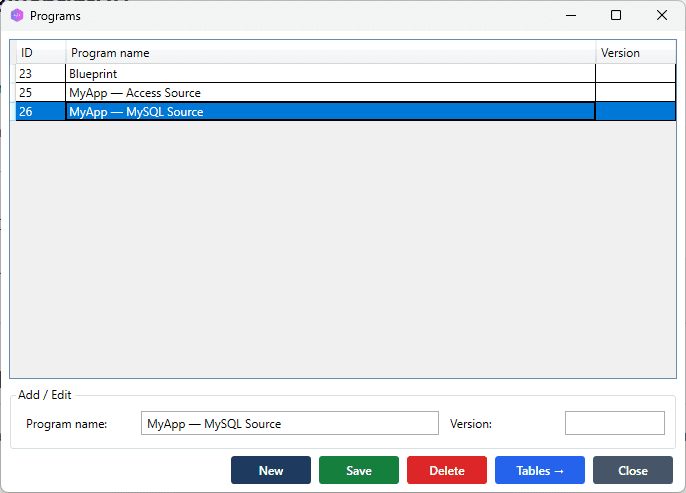
The Program is now the active context. All subsequent schema operations will be scoped to it.
Step 2 — Import the MySQL Schema
Schema Import reads the live structure of a database — tables, columns, data types, nullability, defaults, primary keys, and foreign keys — and populates the Blueprint automatically. This replaces manual entry entirely.
- Click Schema Import in the main menu.
- At the bottom of the window, select from the combo box Existing Program the name of the program you created in Step 1 (e.g. MyApp — MySQL Source).
- Press Next.
- Select MySQL as the backend.
- Enter the connection details:
- Host — IP address or hostname of the MySQL server
- Port — default is
3306 - Database — the source database name
- Username / Password
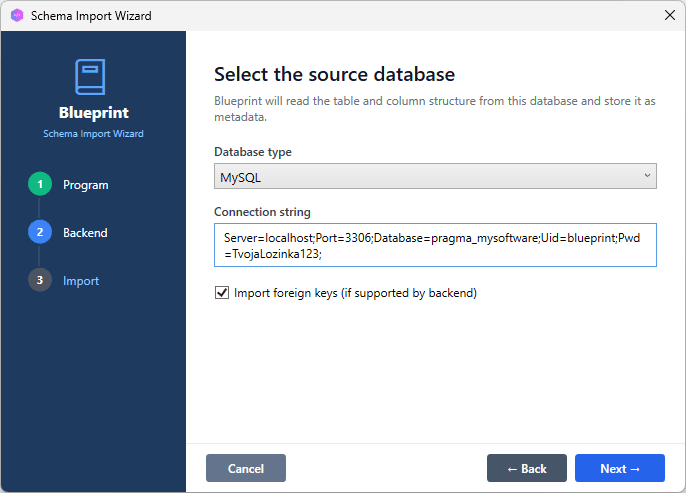
- Click Next. BlueprintDB imports all tables from the database automatically.
[SCREENSHOT: Schema Import window, MySQL selected, connection fields filled]
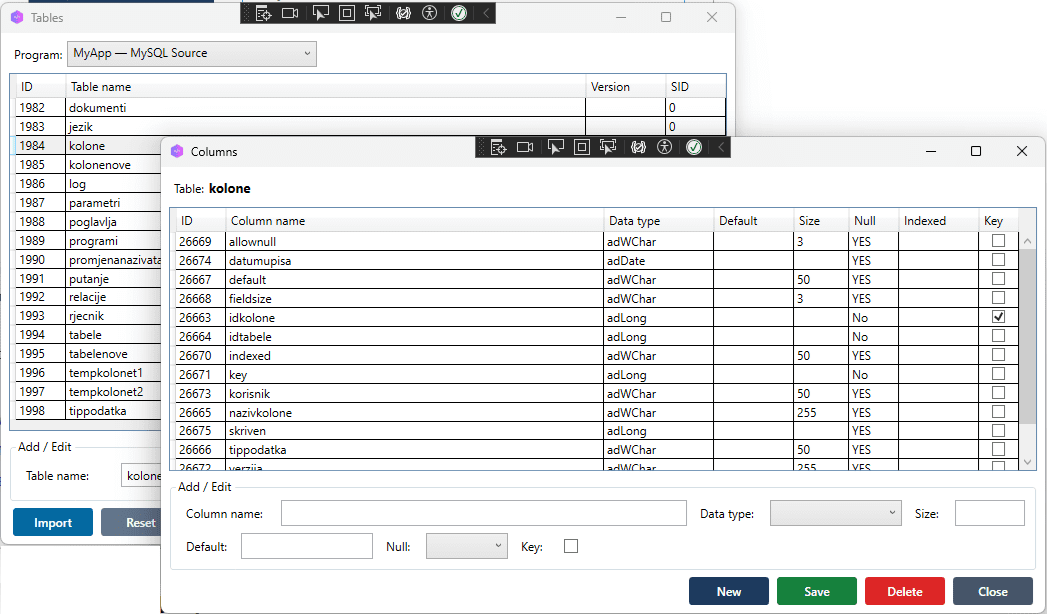
After import, open the Tables and Columns windows to verify the result. Every table from your MySQL database should now appear in the Blueprint, with columns, data types, and constraints correctly mapped to BlueprintDB’s canonical type system.
[SCREENSHOT: Tables window showing the imported table list; Columns window open for one table showing column names, types, nullability]
Note on type mapping: BlueprintDB uses a canonical type system that sits between backend-specific types. MySQL’sTINYINT(1)is mapped to Boolean,VARCHAR(n)to String,DECIMAL(p,s)to Decimal, and so on. When syncing to PostgreSQL, these canonical types are translated to the closest native PostgreSQL equivalent —BOOLEAN,VARCHAR(n),NUMERIC(p,s).
Step 3 — Review and Adjust the Blueprint
Before syncing to PostgreSQL, take a moment to review the imported schema. This is your opportunity to catch anything that needs adjustment before it is applied to the new database.
Common things to check:
- Column types — confirm that MySQL-specific types have been mapped as expected. Open the Columns window for each table and scan the Type column.
- Primary keys — verify that auto-increment columns are marked correctly. BlueprintDB will generate PostgreSQL
SERIALorIDENTITYsyntax accordingly. - Relations — if your MySQL schema uses foreign keys, open the Relations window to confirm they were imported. These will be created as
FOREIGN KEYconstraints in PostgreSQL. - Column names — PostgreSQL folds unquoted identifiers to lowercase. If your MySQL schema uses mixed-case column names, this is the moment to decide whether to standardise them.
Any change you make here is reflected when the schema is synced to PostgreSQL — the Blueprint is the source of truth.
Step 4 — Sync the Schema to PostgreSQL
Schema Sync compares the current Blueprint against the live target database and generates the DDL statements needed to bring the target in line with the Blueprint. On an empty PostgreSQL database, this means creating all tables, columns, constraints, and indexes from scratch.
- From the main menu, click Schema Sync.
- Select PostgreSQL as the backend.
- Enter the connection details for the target PostgreSQL database:
- Host, Port (default
5432), Database, Username, Password
- Host, Port (default
- Click Analyse. BlueprintDB compares the Blueprint against the PostgreSQL database and lists all differences.
- Review the diff list — on a fresh database, all tables will appear as missing and will be created.
- Click Apply to execute the DDL.
[SCREENSHOT: Schema Sync window, PostgreSQL selected, diff list showing all tables as “To be created”, Apply button highlighted]
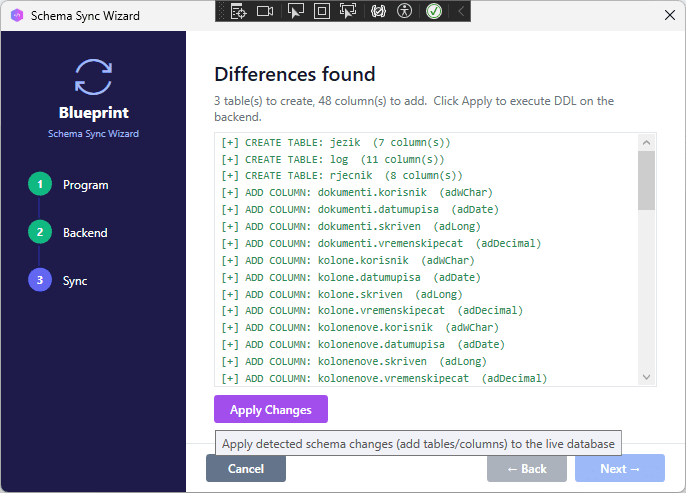
BlueprintDB executes the statements in dependency order — tables with no foreign keys first, then tables that reference them — so constraint creation never fails due to missing referenced tables.
[SCREENSHOT: Schema Sync completed successfully, all items checked green]
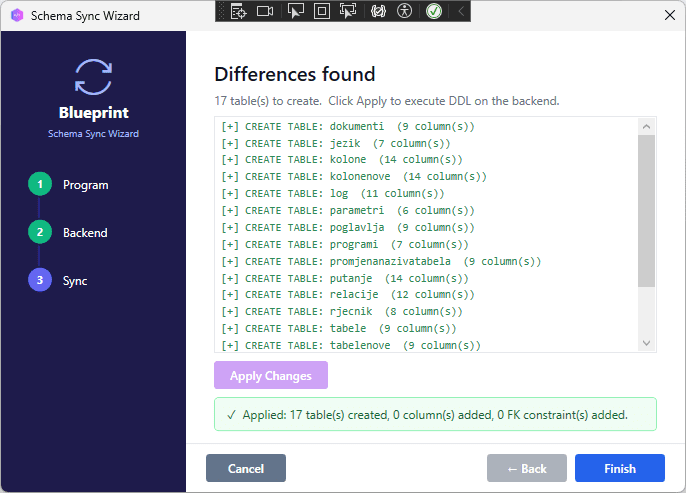
At this point the PostgreSQL database has the full schema: all tables with correct column types, primary keys, and foreign key constraints. No data has been transferred yet.
Step 5 — Transfer the Data
With the schema in place, the Transfer Data Wizard moves the actual row data from MySQL to PostgreSQL. The wizard handles type conversion, batch insertion, and transaction safety automatically.
- From the main menu, click Transfer Data.
- Configure the source connection:
- Backend: MySQL
- Enter the same MySQL connection details used in Step 2.
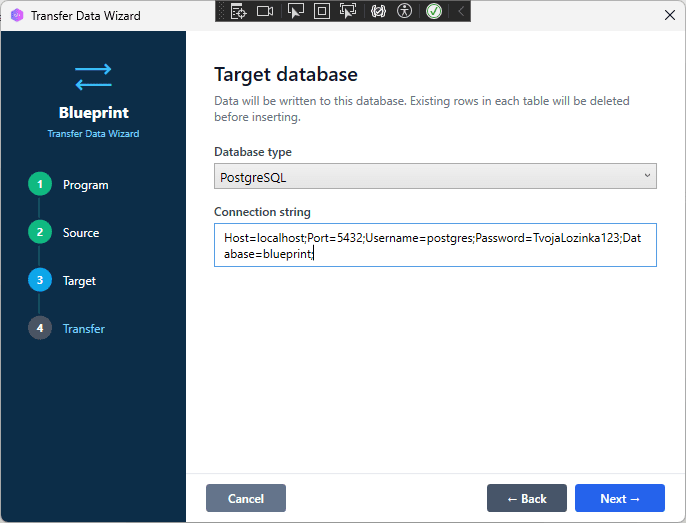
- Configure the destination connection:
- Backend: PostgreSQL
- Enter the PostgreSQL connection details used in Step 4.
- Click Next. The wizard lists all tables found in the source and lets you select which to transfer.
- Select the tables (or select all) and click Start Transfer.
[SCREENSHOT: Transfer Data Wizard — source MySQL and destination PostgreSQL configured, table selection screen with all tables selected]
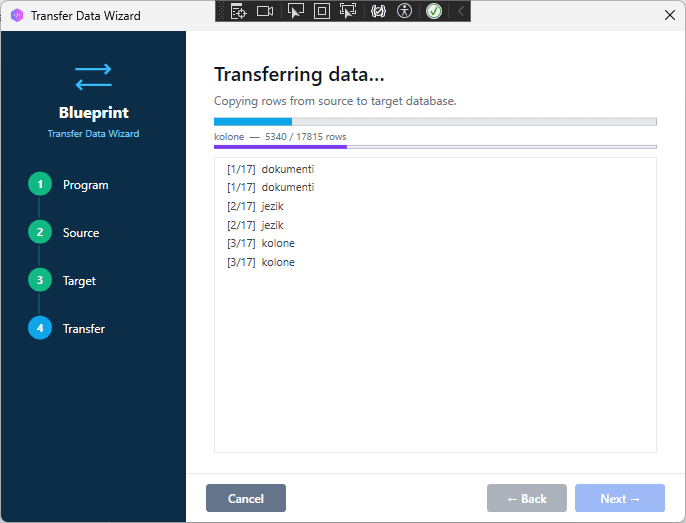
The wizard processes tables in sequence, displaying a progress bar and row count per table. If a table fails (e.g. due to a constraint violation), the error is logged and the wizard continues with the remaining tables.
[SCREENSHOT: Transfer in progress, log panel showing rows transferred per table, progress bar]
When the transfer completes, the log shows a summary: tables processed, rows transferred, and any errors encountered.
[SCREENSHOT: Transfer complete screen, summary showing tables processed, total rows transferred, 0 errors]

Step 6 — Verify the Migration
After the transfer, connect to the PostgreSQL database with your preferred client (psql, DBeaver, DataGrip) and run a quick sanity check:
-- Count rows in each table and compare with MySQL source
SELECT schemaname, tablename, n_live_tup
FROM pg_stat_user_tables
ORDER BY tablename;
Cross-reference the row counts against the MySQL source. If all counts match, the migration is complete.
For applications using sequences (auto-increment columns), reset the PostgreSQL sequences to avoid primary key conflicts when the application starts inserting new rows:
-- Example: reset sequence for table "orders", column "id"
SELECT setval('orders_id_seq', (SELECT MAX(id) FROM orders));
Run this for each auto-increment column in the migrated schema. BlueprintDB’s Schema Sync log shows which columns were created as SERIAL or IDENTITY, making it straightforward to identify which sequences need resetting.
Troubleshooting
Schema Sync fails with “relation already exists”
The target PostgreSQL database is not empty. Either drop the existing tables or create a new empty database and run Schema Sync against that.
Data Transfer fails with “invalid input syntax for type boolean”
MySQL stores booleans as TINYINT(1) with values 0 and 1. If BlueprintDB did not map the column to Boolean during import (check the column type in the Columns window), the raw integer 1 will be inserted into a PostgreSQL BOOLEAN column, causing this error. Fix: open the column in BlueprintDB, change the type to Boolean, re-run Schema Sync (to ALTER the column), then re-run the Transfer.
Foreign key constraint violations during Transfer
The Transfer wizard processes tables in the order they appear in the Blueprint, which may not respect foreign key dependency order. Solution: temporarily disable foreign key checks in PostgreSQL before the transfer:
SET session_replication_role = replica;
-- run transfer
SET session_replication_role = DEFAULT;
Connection refused on PostgreSQL port 5432
Check pg_hba.conf to confirm that the BlueprintDB host is allowed to connect, and that listen_addresses in postgresql.conf includes the interface BlueprintDB is connecting to.
Summary
Migrating from MySQL to PostgreSQL with BlueprintDB involves four main operations:
- Schema Import — reads the MySQL schema into a Blueprint, mapping all types automatically.
- Review — optional adjustments to the Blueprint before the schema is applied.
- Schema Sync — creates all tables, columns, and constraints in the PostgreSQL target.
- Transfer Data — moves row data from MySQL to PostgreSQL with type conversion handled internally.
The same workflow applies to any other backend combination supported by BlueprintDB — SQLite to SQL Server, Access to Oracle, PostgreSQL to DB2, and so on. The canonical type system ensures that column types are translated correctly regardless of source and target engine.